Pages about the Warner Hollywood: an overview | street views 1926 to 1954 | street views 1955 to present | main lobby | basement lounge | upper lobby areas | recent auditorium views | vintage auditorium views | stage | stage basement | other basement areas | booth and attic |
The trap room:

A look across the trap room toward stage right. The entrance to the
orchestra pit is near the left light fixture. Over near the far light if
you take a left you're in the corridor toward dressing rooms and the Wilcox side of the building with access to the mechanical rooms and then to a corridor paralleling Hollywood Blvd.
Photo: Bill Counter - 2012

A plan view of the stage basement area. If you head down the corridor on the upper left of the image you'd be walking toward Wilcox Ave. It's a detail from a full basement plan dated November 1926. Many thanks to April Clemmer for sharing it from her collection. Visit her website, Instagram and Facebook page.

A wood elevator in middle of the the trap room to get items down to storage. Obviously not original equipment. Photo: Bill Counter - 2012

A side view, looking to stage right. Thanks to April Clemmer for sharing her c.2012 photo.

Another look across the trap room toward stage right. Here you get a
better look at the stage floor above. The wood upstage is original. The
concrete downstage is the area that was rebuilt for the Cinerama
installation. Photo: Bill Counter - 2012

Upstage right looking up at a trap. Photo: Bill Counter - 2012

Upstage right. An exciting look at the piping for the sprinkler system. Photo: Bill Counter - 2012

A 2022 trap room view. The lit doorway
is a storage room on the plans as "Future Dressing Room." To the left you're in the dressing room corridor
parallel to the north side of the building and pointing toward Wilcox. It's a shot from "Epic Abandoned Multi Screen Theater," 25 minutes of footage shared on YouTube by Urbex Offlimits.

In the "Future Dressing Room." Photo: Bill Counter - 2012
Down the stage right corridor:

Looking west toward Wilcox. On the far right it's a bit of the door into the "Future Dressing Room." Photo: Bill Counter - 2012

A bit closer to what Lansburgh calls the "Stage Stair Hall" on the plans. The door on the right goes to a toilet room. Photo: Bill Counter - 2012
In that greenish area take a right up to stage level and beyond. Take a left for the organ blower room. Beyond, off to the left, there's a small dressing room and access to the plenum under the seats as well as the main fan room. Chorus rooms are off to the right and mechanical rooms straight ahead. After heading through the boiler and chiller rooms one can wander along the basement areas associated with the Hollywood Blvd. retail spaces.

The stage right corridor is running horizontally through the middle of this image. Click on it for a larger view. It's a detail from a full basement plan dated November 1926. That's the north wall of the building at the top and Wilcox Ave. at the far left. In the upper left it's the women's chorus room with the men's chorus room in the upper center. That's the boiler room in the lower left and the main fan room in the lower center.
To the right of this image of the "Dressing Room Passage" one encounters the stairs up to stage level with the organ blower room opposite the stairs and then you're into the stage right side of the trap room. Many thanks to April Clemmer for sharing the plan from her collection. Visit her April's Old Hollywood website.

The area at the bottom of the stairs as seen from a few steps up. It's a shot from Davy's "Exploring the Hollywood Pacific Theatre,"
the 30 minute video he shared on YouTube in May 2025. He was joined on his
expedition by Moody Gabe and Rees. Thanks to Tommy Bernard for spotting
the video.
The stairs get you to stage level, to dressing rooms on the 2nd floor, and a stage right flyfloor. Here at the bottom of the stairs the trap room is to the
left, the organ blower room straight ahead and the basement dressing
rooms are off to the right.

The small dressing room on the south side of the corridor, a space intended for three performers. Photo: Bill Counter - 2012

Seat parts of an earlier vintage in the basement. Photo: Bill Counter - 2012

Looking down the length of the men's chorus room. There's a toilet room and shower at the far end. On the plans the chorus rooms are identified as "Troupe" rooms. Image: Urbex Offlimits - 2022

The north wall of the men's chorus room. Image: Urbex Offlimits - 2022

Farther down the hall, looking east -- back toward the stage. At the far end one of the doors to the trap room is open. The open door closer to us on the left is to the men's chorus room. On the right it's the smaller dressing room. Image: Urbex Offlimits - 2022

The doorway to the women's chorus room at the west end of the hall, near the mechanical rooms. See the other basement areas page for shots of the fan room, boiler room and other spaces. Image: Urbex Offlimits - 2022

A look at the other side of the door. Room 32 got rebranded as the "Seat Room." Image: Urbex Offlimits - 2022

Looking along the south wall. Image: Urbex Offlimits - 2022

A south wall view from 2010. Thanks to Gary Simon for sharing his photo.

A north wall view in the women's chorus room. Photo: Gary Simon - 2010

A wider north wall view. Image: Urbex Offlimits - 2022

Looking to the west end of the women's chorus room, which is the northwest corner of the building. We're under the two-story dressing room wing that fronts on Wilcox. Image: Urbex Offlimits - 2022
Investigating the pit:

Looking toward stage right along the downstage wall of the trap room. Down the stairs and you're into the pit area. Photo: Bill Counter - 2012

A look toward the pit door from the other direction in 2025. Note one of the ladders just beyond the firedoor. It's a shot from Davy's "Exploring the Hollywood Pacific Theatre," the 30 minute video he shared on YouTube.

Looking in to the area under the pit lift. Image: Davy - 2025

Just inside the firedoor. The stairs get you up to "picture" level of the pit. Photo: Bill Counter - 2012

A look up toward one of the traps. If you go straight ahead instead of taking the stairs on either left or right, you end up under the pit lift, assuming it's in the raised position. If it's down, you could climb onto the lift and ride it up. Photo: Bill Counter - 2012
The pit construction at the Warner is rather interesting. First are the stairs themselves. In most theatres with pit lifts the orchestra would get on at basement level and ride the lift up. Here you could do that or also take either of two sets of stairs to get up after the pit had been raised. The stairs end up at trap doors in a space about 2 1/2 feet wide between the upstage side of the lift and the front of the stage. Most lifts of this vintage are positioned right at the front of the stage without a gap.
The third interesting item is the fact that the organ lift wasn't quite at the end of the pit -- the orchestra lift platform actually is cantilevered around the organ lift in front and on the far side (stage right). The pit area was covered with a concrete slab for the second of the two Cinerama renovations. There's a couple of feet between this slab and the current position of the pit lift.

Up on top at center -- and at left note that you can see a bit under the frame of the pit lift. Photo: Bill Counter - 2012

Up on top at stage left. The hatches are where you'd come up into audience view if taking the stairs up to raised pit level. Photo: Bill Counter - 2012
That's the pit lift at the left of the steel railing. Note the vertical guide close to the near hatch. The proscenium wall is at the right.

A look farther downstage on the lift. The steel above supports decking and concrete -- the pit is entombed for the moment. Photo: Bill Counter - 2012

A fun photo to get: looking at some original drapery fabric on the railing across the upstage side of the pit lift. Photo: Bill Counter - 2012
Heading under the pit lift. Image: Urbex Offlimits - 2022

Under the lift at center -- looking at the controller on the pit front wall. This area seems to have become a favorite storage area for surplus doors. Photo: Bill Counter - 2012

Looking toward stage left from the center. It's another shot from "Epic Abandoned Multi Screen Theater," 25 minutes of footage shared on YouTube in 2022 by Urbex Offlimits.

The mostly intact mechanism for the orchestra pit lift. We're looking toward stage left. From left to right it's the motor itself, an electric brake, and the gearbox that drives the horizontal axle. Photo: Bill Counter - 2012

A view left but from farther to stage right. The door at the left goes to the area with the ladders and out to the trap room. Photo: Bill Counter - 2012

The pit front wall toward looking toward stage right. The next concrete pylon over (behind the axle and with a red seat cushion on it) is the location for the organ lift mechanism -- now removed. Photo: Bill Counter - 2012

The pylon that used to have the organ lift mechanism atop it. Photo: Bill Counter - 2012

The area that used to have the platform for the organ lift. Note that the pit lift completely encircled the organ lift. The screw in the foreground is one of four for the pit lift. Photo: Bill Counter - 2012
Down the stage left corridor:

Across the trap room toward stage left in 2012. The elevator is in the cage at
the left. Head down the corridor where the light is to the clapper room,
the main switchboard room and on toward the lobby end of the building. A
bit of the stairs to the pit entrance can be seen on the right. Photo:
Bill Counter

A view toward stage left in 2025. Note that the chain-link cage in the trap room had been emptied out. It's a shot from "Abandoned Pacific Theater (Gone Wrong)," 30 minutes of footage shared on YouTube from Cali Adventures 01 in May 2025.

Take a right to head down the corridor. Image: Cali Adventures 01 - 2025

Looking out to the corridor from upstage left in the musicians room. The stairs up to stage level are in the distance. Image: Cali Adventures 01 - 2025

Heading toward Hollywood Blvd. and the stairs up to stage level. Image: Cali Adventures 01 - 2025

At the stage left stairs, looking upstage -- back toward the musicians' rooms. If you take a left before that door you would be in the stage left end of the trap room. On the far left it's a bit of the door to the clapper room -- with the door not located where it's shown on the plan below. On the plan the room is identified as the "Remote Control Switch Board Rm." Photo: Bill Counter - 2012
Note a couple of tension blocks hanging down in the upper right near the building's east wall. And check out that section of pinrail on the far right -- presumably for storage of cables or rope. Behind us are the stairs and the door to the main switchboard room -- and on toward the lobby end of the building. The other basement areas page has photos of the building's main switchboard.

The east wall of the building is running along the right side of this detail from the full basement plan dated November 1926. That's a bit of the trap room and orchestra pit at the top with the plenum space under the seats on the left.
In the lower part of the image it's the "Motor Generator Room," which also houses the building's main electrical service switchboard along the east wall. Down in the lower left of this detail is the booth for the screening room. Above it is the battery room for power to emergency lighting circuits. Many thanks
to April Clemmer for sharing the plan from her collection. Visit her April's Old Hollywood website.

In the room at the bottom of the stage left stairs. We're looking down the length of the clapper board, also known as the "remote controlled switchboard." Photo: Bill Counter - 2012
The relays on this board are activated by switches on the main stage switchboard (aka the "pilot board") to control house and stage lighting circuits. At the far end of the rack are saturable reactor dimmers (also termed reactance dimmers) used to control the larger auditorium lighting loads. Transfer switches on the near end of the board allow many of the stage circuits to be powered by either AC or DC. The Frank Adam Electric Co.'s publication "Electrical Data on Three Major Theatres" discusses this part of the installation:
"The Remote Controlled Switchboard of the stage lighting system is installed in a specially designed room adjacent to the main switchboard. The reactance dimmers, booster transformers and the motor generator sets to supply direct current for the reactance dimmers are installed in this room.

"The remote controlled switchboard is 18 feet 9 inches long and 8 feet 6 inches high. It is provided with a steel pull box at the top in which the various cables and wires entering and leaving this switchboard are distributed to their various terminals. The remote controlled switches, 158 in number, are of the Frank Adam 100-ampere single pole type and have been designed for use with the Frank Adam Major System of theatre lighting control. Each switch is mounted on a moulded insulation base 5 inches wide and 13 inches high, with the required capacity fuse connection for the sub feeder to the magazine panelboard.
"...These remote controlled switches are controlled from the pilot switchboard located on the stage. The remote controlled switches in turn control theentire lighting load on the stage and in the auditorium. In addition to the remote controlled switches there are five 200-ampere 3-pole double throw knife switches to permit throwing the feeders to the stage auxiliary switchboards from the normal AC service to emergency DC service."
The Frank Adam publication also dealt with the Mosque in Richmond and the Stanley Theatre in Jersey City. It was in the collection of Lyman Brenneman and reprinted by the Theatre Historical Society in 1973. Thanks to Bob Foreman for making it available. His Vintage Theatre Catalogs site has a number of interesting items including a post of a Frank Adam/Major catalog from 1922 and a post of a 1952 Frank Adam catalog along with photos of earlier installations.

The rear of the clapper board. The item sitting on the floor at center is a step-up transformer to compensate for the voltage drop across a saturable reactor dimmer when full up. It allows the lights to have their full 120V brightness. Photo: Bill Counter - 2012

A small motor generator set in the clapper room. The saturable reactor dimmers require DC through a control winding to desaturate the core and allow the lights to come up. The lights are dimmed when no DC voltage is present. The DC to the dimmers is controlled through resistance dimmer plates on the main stage switchboard. The board also has resistance plates directly controlling smaller loads. Photo: Bill Counter - 2012

At the far end of the rack, looking at several saturable reactor dimmers. Photo: Bill Counter - 2012

A closer look at a row of dimmers. These Cutler-Hammer units typically handle two circuits each with each circuit rated approximately 4,000 watts. The first dimmers here on this end of the rack were for the lamps in the cloud machines. Photo: Bill Counter - 2012

The stage left stairs. On the right, as seen on the door, it's the "Remote Control Switch Board Rm." Straight ahead it's down a few steps to the main electrical service with that firedoor labeled "Switch Board - Generator Room." It's a shot from Davy's "Exploring the Hollywood Pacific Theatre," his 30 minute 2025 video on YouTube.

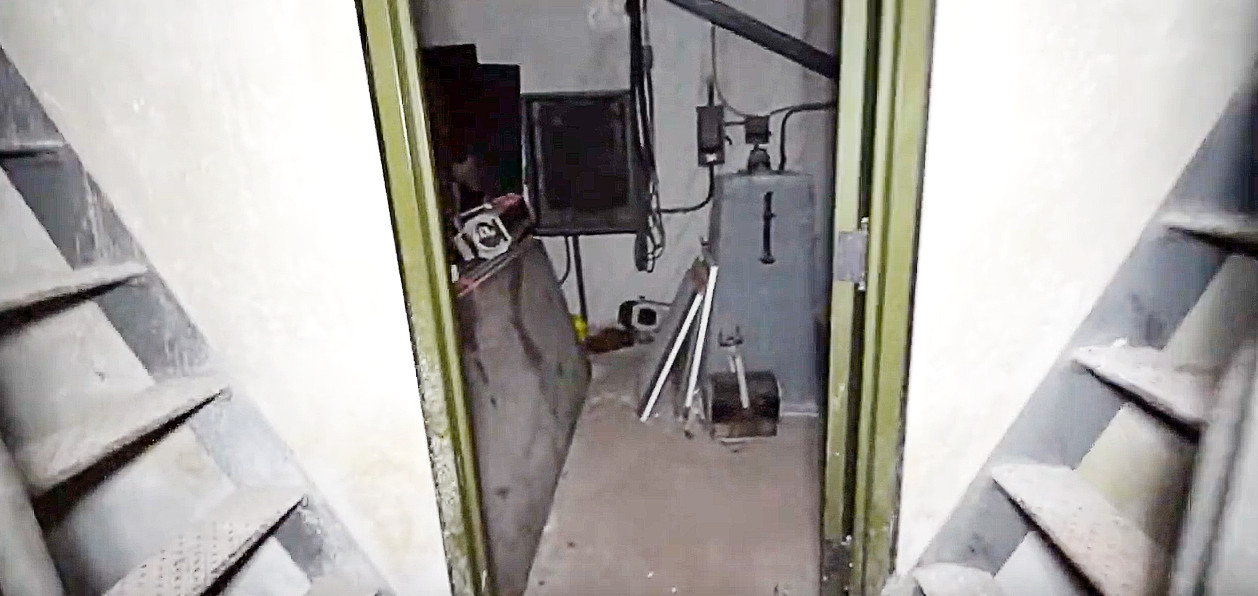
The door to the switchboard room. See the other basement areas for photos of that room and others beyond in the areas closer to Hollywood Blvd. Image: Davy - 2025. Thanks!

Looking back toward the trap room from the stairs up to stage left. That's the door to the contactor room in the center of the shot. Image: Cali Adventures 01 - 2025
Pages about the Warner Hollywood:
| an overview | street views 1926 to 1954 | street views 1955 to present | main lobby | basement lounge | upper lobby areas | recent auditorium views | vintage auditorium views | stage | back to top - stage basement | other basement areas | booth and attic | all warner hollywood posts |
| Hollywood Theatres: overview and alphabetical lists | Hollywood Theatres: list by address | Hollywood Christmas | Downtown theatres | Westside | Westwood and Brentwood | Along the Coast | [more] Los Angeles movie palaces | L.A. Theatres: main alphabetical list | L.A. Theatres: list by address | theatre history resources | film and theatre tech resources | theatres in movies | LA Theatres on facebook | contact info | welcome and site navigation guide |
No comments:
Post a Comment